

Table of Contents
- How to Diagnose Irrigation System Water Leaks: The Basics
- Step 1: Check Your Water Meter for Leak Signs
- Step 2: Inspect Your Sprinkler Heads and Visible Components
- Step 3: Identify Wet Spots and Ground Saturation Patterns
- Common Irrigation Problems in Australia and How to Spot Them
- Finding Underground Water Leaks in Your Irrigation System
- Irrigation System Maintenance Checklist to Prevent Future Leaks
- Common Mistakes to Avoid When Diagnosing Irrigation Leaks
Diagnose Irrigation System Water Leaks: Step-by-Step Guide
Last Updated: July 29, 2026
When your water bill spikes unexpectedly, the culprit is often hidden beneath your lawn. Learning to diagnose irrigation system water leaks can save thousands of dollars and prevent damage to your property’s foundation and landscaping. At WaterPro’s, we’ve spent over three decades helping Melbourne homeowners pinpoint leaks before they become costly problems. This guide walks you through the systematic approach our technicians use to identify where water is escaping from your irrigation network.
How to Diagnose Irrigation System Water Leaks: The Basics
A leak in your irrigation system can occur anywhere from the mainline running from your water meter to individual lateral lines feeding your sprinkler heads. Mainline breaks affect your entire system’s pressure, while lateral leaks may only impact specific zones. Successful leak detection requires patience and systematic observation.
What You’ll Need Before You Start
Gather these items before beginning your investigation:
- A water meter reader (most Australian homes have a digital or analog meter)
- A screwdriver set for accessing valve boxes
- A pressure gauge (optional but invaluable for advanced diagnostics)
- A flow sensor or bucket for measuring water discharge
- A moisture meter or visual assessment skills
- Notebook to record meter readings and observations
- Flashlight for inspecting valve boxes and sprinkler heads
Step 1: Check Your Water Meter for Leak Signs
Your water meter is the first and most reliable indicator of a leak. Begin by turning off all water-consuming appliances, washing machines, dishwashers, showers, and indoor taps. Even a slowly dripping tap will register on your meter and confuse your readings.
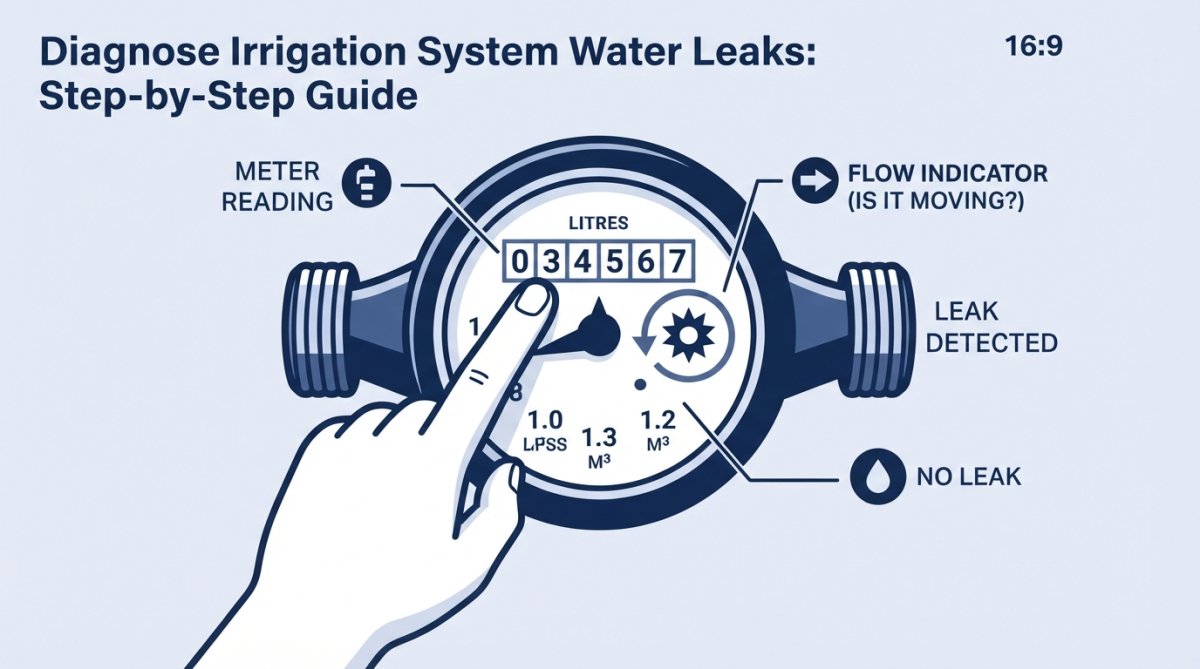
Once everything inside your home is off, check whether your meter’s flow indicator is moving. On most Australian residential meters, you’ll see a small dial or needle that spins when water flows. If this dial moves when no water should be running, you have a leak somewhere in your system.
Reading Your Meter and Identifying Flow
Record your meter reading at the start of your investigation and note the time. Wait 15 minutes without using any water, then read the meter again. Any increase in the reading indicates water loss.
To pinpoint whether the leak is in your irrigation system or elsewhere, turn off your main irrigation controller and repeat the test. If the meter stops advancing, your leak is definitely in the irrigation network. If it continues advancing, the leak exists in your household plumbing.
Most Australian water meters have a small red or blue indicator needle on the dial face. This needle moves with even tiny leaks. Watch it for 30 seconds; if it’s moving, water is flowing somewhere.
For precise measurement, use the bucket method. Turn off your irrigation system and all indoor water use. Place a bucket under an outdoor tap and turn it on slightly, letting water drip for exactly one minute. Measure the accumulated water. If your meter shows similar flow when nothing should be running, you’ve confirmed a leak.
Step 2: Inspect Your Sprinkler Heads and Visible Components
Walk your entire property systematically, examining every sprinkler head, valve box, and above-ground pipe connection. Look for water pooling, soggy patches, or continuous dripping even when the system isn’t running.
Sprinkler head damage accounts for roughly 30% of irrigation leaks in residential systems. A cracked nozzle, broken riser, or misaligned head can waste significant water daily. Even small continuous leaks compound into substantial water loss over weeks.
Common Sprinkler Head Issues and Debris Problems
Sediment and debris frequently cause leaks at the sprinkler head connection point. When water pressure forces dirt into the seal between the riser and the head, it creates a gap where water escapes.
Inspect each sprinkler head for:
- Cracks in the plastic body – Replace the entire head if cracked
- Debris stuck in the nozzle – Clean with a small brush or compressed air
- Loose connections at the riser – Tighten by hand; use a wrench only if necessary
- Misaligned or sunken heads – Water sprays in wrong directions, pooling rather than distributing
- Mineral buildup around the nozzle – Indicates slow leaking and poor spray pattern
A single broken sprinkler head wastes 5-10 litres per hour depending on your system’s pressure. Over a week, that’s 840-1,680 litres of wasted water.
Never force a stuck sprinkler head connection. Over-tightening can crack the riser or the head itself, creating a worse leak. If it won’t budge by hand, leave it for a professional or apply penetrating oil and wait 24 hours.
Step 3: Identify Wet Spots and Ground Saturation Patterns
Underground leaks reveal themselves through abnormal moisture patterns in your lawn and garden. Walk your property after the irrigation system has run, or the morning after a watering cycle. Look for areas that remain wet or muddy longer than surrounding sections.
Wet spots that appear in the same location every cycle almost certainly indicate an underground leak directly beneath that area. Track the wet spots across multiple watering cycles to confirm the pattern.
Distinguishing Mainline vs. Lateral Line Leaks
A mainline leak affects your entire irrigation system because it occurs before the water splits into individual zones. You’ll notice reduced pressure across all zones, and the wet spot will typically be larger and more continuous.
A lateral line leak affects only the zone that line serves. You’ll see normal pressure in other zones but noticeably weaker spray in the affected zone. The wet spot will be smaller and more localized.
To distinguish between them, turn off your irrigation system and observe the wet spot for 24 hours. If it dries out completely, the leak occurs only during active watering, likely a lateral line issue. If moisture persists even when the system is off, you’re dealing with a mainline leak under constant pressure.
A mainline leak shows up as a large wet area that stays soggy even days after watering. A lateral line leak appears as a smaller wet patch directly under a specific zone, drying quickly once the system shuts off.
Common Irrigation Problems in Australia and How to Spot Them
Australian soil conditions and climate patterns create specific leak vulnerabilities. Clay-heavy soils expand and contract seasonally, stressing pipe connections. Sandy soils allow water to percolate quickly, making small leaks harder to spot visually. Root intrusion is particularly common in Australian gardens, as tree and shrub roots seek out irrigation lines as a water source, slowly puncturing pipes and creating hairline cracks.
UV exposure degrades plastic irrigation components over time. Exposed lateral lines, fittings, and sprinkler heads left in direct sunlight for 5-10 years become brittle and prone to cracking. Water pressure fluctuations stress your system’s weakest points, and when demand spikes during hot weather, pressure surges can rupture aging pipes.
Finding Underground Water Leaks in Your Irrigation System
Once you’ve ruled out visible leaks and identified a wet spot pattern, you’re dealing with an underground leak. The most practical approach involves dividing your system into zones and testing each one individually. Turn off your main irrigation controller and manually activate each zone for 10 minutes while observing for wet spots. Whichever zone produces a wet spot contains the leak.
Using Flow Sensors and Pressure Testing
A flow sensor measures the rate of water moving through a pipe. If your system delivers 100 litres per minute but a zone only uses 80 litres per minute, 20 litres per minute is escaping somewhere. By comparing expected flow to actual flow for each zone, you can identify which line contains the leak.
Pressure testing is more technical but provides definitive information. A qualified technician connects a pressure gauge to your irrigation system and measures static pressure (when the system is off) and dynamic pressure (when it’s running). A sudden pressure drop in a specific zone indicates a leak in that zone’s lateral line.
WaterPro’s technicians use digital flow sensors and pressure gauges as standard diagnostic equipment. These tools eliminate guesswork and allow us to locate leaks to within a few metres, significantly reducing the excavation required for repairs.
DIY vs. Professional Leak Detection: Costs and Trade-Offs
Diagnosing a leak yourself costs nothing beyond the time invested. This approach works well for obvious leaks, broken sprinkler heads, visible cracks, or wet spots appearing in the same location repeatedly.
However, DIY diagnosis has limits. If your leak is small and underground, you might spend hours digging in the wrong location. Professional leak detection using sonic equipment, thermal imaging, or dye tracing pinpoints leaks within centimetres. A professional service costs between $150-$400 depending on system complexity, but it saves the cost of excavating multiple incorrect locations.
Irrigation System Maintenance Checklist to Prevent Future Leaks
Prevention is always cheaper than repair. Perform these checks seasonally:
- Spring (September-October): Run each zone individually and observe pressure and spray pattern. Check all visible connections for moisture. Inspect sprinkler heads for debris and cracks.
- Summer (December-February): Monitor your water meter weekly for unexpected increases. Check for new wet spots after each watering cycle. Clean sprinkler nozzles of sediment buildup.
- Autumn (March-May): Flush your system to remove accumulated sediment. Check valve boxes for water pooling, which indicates leaking solenoids. Inspect above-ground pipes for cracks or damage.
- Winter (June-August): If you’re in a frost-prone area, drain your system to prevent freeze damage. Check for leaks that may have developed during the previous season.
Seasonal Checks and Smart Controller Integration
Modern smart irrigation controllers can help you detect leaks automatically by monitoring soil moisture and weather conditions. Many smart controllers include flow monitoring features that alert you when water usage exceeds expected levels.
If your system includes a smart controller, check its flow history monthly. A sudden increase in flow for a specific zone, without any changes to your sprinkler configuration, indicates a developing leak. Upgrading to a smart controller is a worthwhile investment if you’re experiencing recurring leaks.
Common Mistakes to Avoid When Diagnosing Irrigation Leaks
The first mistake is assuming all wet spots indicate leaks. Sometimes wet areas result from poor drainage, overwatering by the sprinkler head above that spot, or soil settling that creates a depression where water pools. Observe the wet spot across multiple watering cycles.
A second common error is testing your system with indoor water running. Ensure everyone in the household understands you’re conducting a diagnostic test and that no water should be used for 30 minutes.
Many people also ignore pressure problems, assuming low pressure is normal. If one zone sprays noticeably weaker than others, investigate. Weak spray often indicates a leak in that zone’s lateral line.
Finally, avoid digging randomly in wet areas. Always mark the suspected leak location clearly, dig carefully to avoid damaging the pipe further, and have the repair materials ready before you excavate.
Finding and fixing irrigation leaks protects your garden, conserves water, and prevents expensive property damage. While many leaks are straightforward to diagnose, underground leaks and complex systems often benefit from professional assessment. WaterPro’s offers comprehensive leak detection and repair services tailored to your system’s specific needs. Our qualified technicians use advanced diagnostic equipment to locate leaks precisely, then provide customized repair solutions that restore your system to full efficiency. Contact WaterPro’s today for a professional leak assessment and get your irrigation system running at peak performance.
Frequently Asked Questions
How do I know if my irrigation system has a leak?
Common signs include a higher-than-normal water bill, wet or soggy patches in your lawn, dying grass in specific zones despite adequate watering, and visible water pooling or mud. Check your water meter while all irrigation zones are off, if it continues moving, you likely have a leak. Look for reduced water pressure at sprinkler heads or unusual hissing sounds from the ground, which may indicate pressurised water escaping from a mainline or lateral line.
What should I check during a water meter leak test?
Turn off all water sources, including your irrigation system's master valve and shut-off valve. Note your water meter reading and wait 30 minutes without using any water. If the meter has advanced, you have a leak. Repeat the test with only the irrigation system pressurised to confirm the leak is in your irrigation system rather than your household plumbing. This simple water meter leak test is one of the most reliable diagnostic methods available.
Can I find an underground irrigation leak myself, or do I need professional help?
Many homeowners can identify surface leaks and wet spots, but underground leaks in mainline or lateral line pipes are harder to pinpoint without specialist equipment like flow sensors or ground-penetrating radar. DIY methods include listening for hissing, observing ground saturation patterns, and using continuity tests on solenoid valves. However, if you cannot locate the leak after visual inspection and water meter testing, professional leak detection services have thermal imaging and acoustic equipment that can pinpoint underground breaks accurately and cost-effectively.
What are the most common irrigation problems in Australia that cause leaks?
Australian conditions create specific challenges: high summer temperatures cause pipe stress and joint failures, clay soils retain moisture and mask leaks, and UV exposure degrades above-ground fittings. Tree root intrusion is common in older systems, and sediment buildup clogs sprinkler heads and weeping valves. Poor installation of lateral lines and manifold connections often leads to slow leaks. Regular irrigation system maintenance checklist reviews, including pressure checks and debris removal, help prevent these issues before they develop into costly water loss.
This article was written using GrandRanker