

Table of Contents
- Why Garden Lighting Glare Matters
- Understanding Light Positioning and Mounting Height
- Shielding Outdoor Light Fixtures to Control Light Spill
- Selecting the Right Outdoor Lighting Beam Angles
- Balancing Light Intensity and Lumen Output
- Smart Dimming and Colour Temperature Control
- Reflective Surfaces and Maintenance
- Common Garden Lighting Mistakes to Avoid
Last Updated: August 11, 2026
Why Garden Lighting Glare Matters
Garden lighting glare prevention is essential for creating outdoor spaces that are both beautiful and functional. When outdoor light fixtures aren’t properly positioned or shielded, they produce harsh glare that diminishes visibility, creates discomfort for you and your neighbours, and wastes energy. The problem extends beyond mere annoyance, uncontrolled light spill disrupts sleep patterns in nearby homes, affects local wildlife, and can even reduce the perceived safety of your garden by creating dark shadows alongside bright spots.
At WaterPro’s, we’ve designed countless garden lighting installations across Melbourne properties, and the most successful ones share a common trait: they control light distribution at the source. This means thinking strategically about fixture placement, beam angles, and shielding long before installation begins. The difference between a glaring installation and a refined one often comes down to understanding how light behaves and taking deliberate steps to direct it where it’s needed.
This guide covers the practical garden lighting glare prevention strategies that transform outdoor spaces from harsh and uncomfortable to welcoming and well-lit. You’ll learn how to position fixtures effectively, select the right shielding techniques, and balance intensity with aesthetics.
Understanding Light Positioning and Mounting Height
The foundation of effective garden lighting glare prevention starts with positioning. Where you place a fixture and how high you mount it determine whether light spreads uncontrollably or concentrates where you want it.
Mounting height directly influences beam spread and glare intensity. A fixture mounted too low creates harsh shadows and forces light upward into neighbours’ windows and the night sky. A fixture mounted too high spreads light over a larger area but with less intensity, which often requires higher lumen output to achieve the same brightness on the ground. The sweet spot typically sits between 1.5 and 2.5 metres for pathway and accent lighting, though this varies depending on your beam angle and the area you’re lighting.
Light positioning also determines whether direct bulb visibility becomes an issue. When a fixture is positioned at eye level or above, the bulb itself becomes visible and creates discomfort glare, the sensation of brightness that makes viewing uncomfortable. Positioning fixtures below eye level from typical standing positions reduces this problem significantly. This is why ground-level uplighting and well-shielded wall-mounted fixtures perform better than exposed overhead installations.
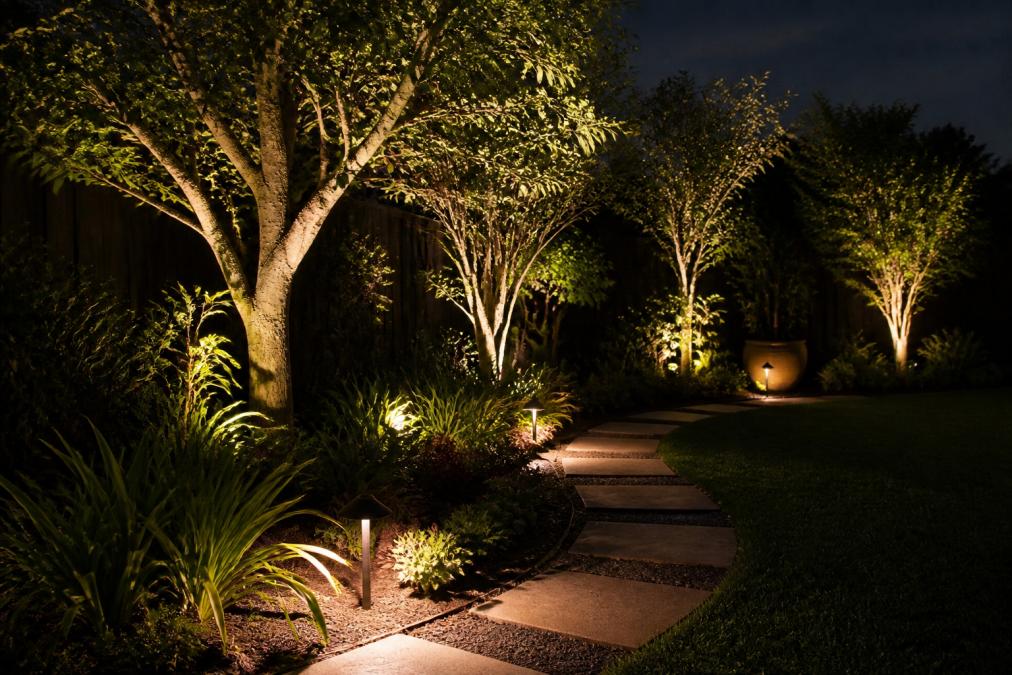
Consider the relationship between your fixture placement and nearby windows, fences, and garden features. A light positioned to graze a fence creates dramatic texture and shadow without spilling light into neighbouring properties. The same fixture positioned to illuminate a tree canopy from below creates ambient light without glare. Strategic placement uses your garden’s natural features as barriers and diffusers.
Shielding Outdoor Light Fixtures to Control Light Spill
Shielding is your primary tool for controlling light spill and preventing unwanted glare from outdoor fixtures. Without proper shielding, even well-positioned lights spread light in all directions, creating light pollution and discomfort for anyone nearby.
Glare guards and visors
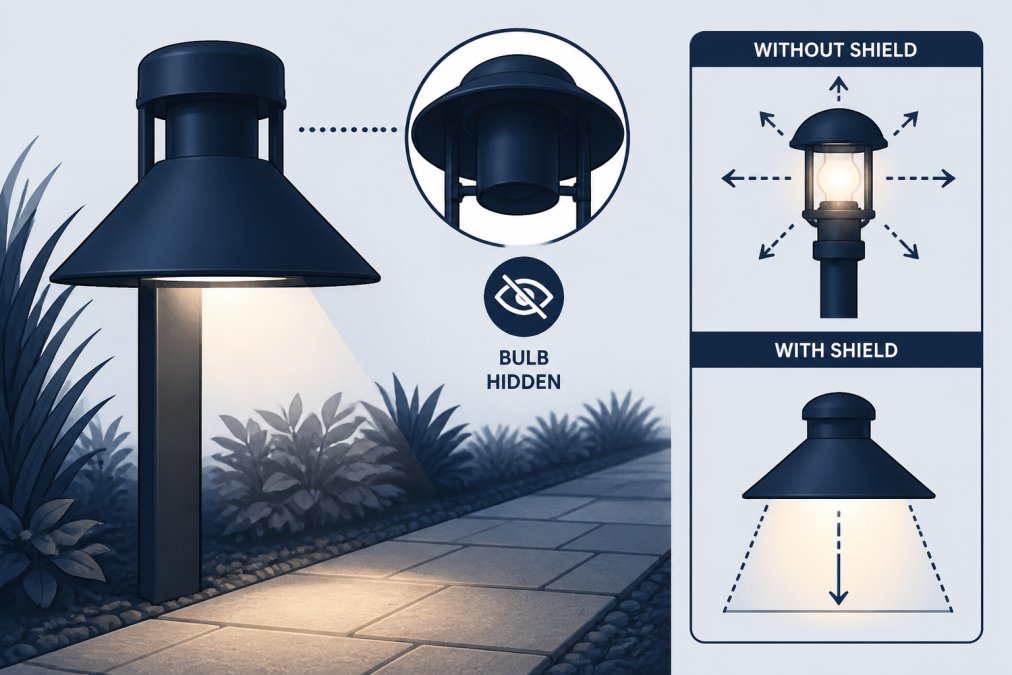
Glare guards and visors are physical barriers that block direct bulb visibility and redirect light downward. A glare guard sits directly over the light source, creating a shield that prevents upward light emission. This is particularly effective for pathway lighting, where the goal is to illuminate the ground without creating sky glow or light trespass into upper-storey windows.
Visors function similarly but extend further, projecting a shadow that blocks light from spreading sideways. They’re especially useful for wall-mounted fixtures where you want light to fall on specific areas, such as a garden bed or seating area, without illuminating adjacent spaces. A well-designed visor can reduce glare by 60-70% compared to an unshielded fixture of the same output.
When selecting a glare guard or visor, ensure it matches your fixture’s beam angle. A guard designed for a 40-degree beam won’t effectively shield a 120-degree fixture. The material also matters: matte finishes reduce internal reflections that can create secondary glare, while reflective finishes inside the guard can redirect light more precisely downward.
Avoiding direct bulb visibility
Direct bulb visibility is one of the most common causes of discomfort glare. Even if a fixture produces only modest light output, seeing the bulb directly creates an unpleasant sensation that makes the garden feel harsh and uninviting. The solution involves positioning fixtures so the bulb sits below the sight line and installing shielding that blocks any direct view.
Recessed fixtures, lights mounted flush with or below the surface they’re attached to, naturally eliminate bulb visibility. A recessed wall light or recessed deck fixture keeps the bulb hidden while directing light outward. Similarly, fixtures with deep housings create internal shadows that obscure the bulb from most viewing angles. These designs cost slightly more upfront but deliver significantly better visual comfort.
Diffusing materials also help. A frosted or translucent lens spreads light more evenly and makes the bulb appear less bright by distributing its intensity across a larger surface area. This creates softer illumination and reduces the contrast between the bright bulb and its surroundings.
Selecting the Right Outdoor Lighting Beam Angles
Beam angle determines how widely light spreads from your fixture. Understanding beam angles allows you to match fixture output to your garden’s layout and prevent unnecessary light spill.
Beam angles typically range from 15 degrees (narrow, focused beam) to 120 degrees or wider (broad, diffuse spread). A narrow 15-20 degree beam concentrates light on a specific object, ideal for accent lighting on a sculpture or tree. A 40-50 degree beam suits pathway lighting, providing good ground coverage without excessive spread. Wider beams of 80-120 degrees work for general area lighting but require careful placement to avoid spilling light into unwanted zones.
The relationship between beam angle and mounting height is crucial. A 40-degree beam mounted 2 metres high covers roughly a 1.5-metre diameter circle on the ground. The same fixture mounted at 1 metre height covers a smaller area with higher intensity. A 120-degree beam at the same heights spreads much wider, creating potential for light spill unless positioned away from property boundaries.
When planning outdoor lighting beam angles for your garden, sketch your space and mark where light should fall. This visual exercise often reveals that a narrower beam than you initially thought works better, reducing glare and light pollution while using less energy. Narrower beams also create more dramatic, intentional lighting effects rather than uniform brightness.
Balancing Light Intensity and Lumen Output
Light intensity, measured in lumens, directly affects glare perception and energy consumption. More light doesn’t always mean better results; often it creates more glare and wastes electricity.
Most residential garden lighting performs well with 300-800 lumens per fixture for pathway and accent applications. Pathway lighting in the 300-500 lumen range provides safe visibility without harsh glare. Accent lighting on plants or architectural features often works better at 400-600 lumens, creating visual interest without overwhelming the space. General area lighting might reach 800+ lumens, but only when spread across multiple fixtures rather than concentrated in one location.
The perceived brightness depends on colour temperature as well as lumen output. A 500-lumen fixture with warm white light (2700K) feels less intense than a 500-lumen fixture with cool white light (5000K), even though they produce the same light quantity. This is why many garden designers prefer warm white lighting, it delivers adequate visibility while maintaining a comfortable, inviting atmosphere.
Consider the inverse square law: light intensity decreases with distance squared from the source. A fixture producing 600 lumens at 1 metre distance produces only 150 lumens at 2 metres. This principle suggests that strategic placement of moderate-output fixtures often outperforms fewer high-output fixtures. You achieve better coverage, more even illumination, and less glare by distributing light across multiple points.
Smart Dimming and Colour Temperature Control
Modern garden lighting systems increasingly incorporate smart dimming and colour temperature adjustment, offering flexibility that fixed installations cannot match. These technologies allow you to adapt your garden’s lighting to different times, seasons, and activities.
Dimming capability reduces glare during peak evening hours when your eyes are most sensitive. A fixture set to 100% output might create uncomfortable glare at 8 p.m., but the same fixture dimmed to 60% provides adequate visibility without harshness. Many smart systems allow scheduling, so lights automatically dim after a certain hour or brighten as dusk deepens. This adapts to your eye’s changing sensitivity throughout the evening.
Colour temperature control, shifting between warm white (2700K) and neutral white (4000K), offers another layer of flexibility. Warm white creates a relaxing, intimate atmosphere and produces less glare perception. Neutral white provides better visibility for task-oriented areas like driveways or work zones. Some systems allow gradual colour shifts through the evening, starting warm and slightly cooling as night deepens.
LED technology makes smart dimming practical and affordable. LED fixtures maintain colour quality and brightness across a wide dimming range, unlike older halogen or incandescent systems that often look dim and yellow when dimmed. This means you can reliably dim without sacrificing visual comfort or colour accuracy.
Reflective Surfaces and Maintenance
Reflective surfaces in your garden, water features, light-coloured paving, polished stone, interact with your lighting in ways that create or worsen glare. Understanding these interactions helps you position fixtures strategically and maintain surfaces appropriately.
Water reflects light strongly, creating bright spots that can produce glare. A pond or fountain lit from above creates harsh reflections. The solution involves positioning lights at low angles to graze the water surface, creating shimmer and texture without direct reflection into viewing areas. Alternatively, underwater lighting or side-mounted fixtures avoid harsh surface reflections entirely.
Light-coloured paving and surfaces amplify perceived brightness. A 500-lumen fixture on light grey paving produces more glare than the same fixture on dark pavers. This doesn’t mean avoiding light surfaces, it means accounting for their reflectivity when selecting fixture output. You might use lower-lumen fixtures on light surfaces and higher-lumen fixtures on darker areas to achieve balanced illumination.
Maintenance directly affects glare and light quality. Dirty fixtures scatter light inefficiently, creating glare while reducing useful illumination. Dust, pollen, and weathering on lens surfaces diffuse light unpredictably, concentrating it in some directions and losing it in others. Regular cleaning, typically twice yearly for most Australian gardens, keeps fixtures performing as designed. A simple wipe with a soft cloth and mild soap restores clarity and reduces unwanted glare.
Reflective surfaces also require maintenance. Algae growth on light-coloured stone changes its reflectivity, affecting how light bounces and spreads. Seasonal cleaning prevents this degradation and maintains consistent lighting performance throughout the year.
Common Garden Lighting Mistakes to Avoid
Most garden lighting problems stem from a handful of recurring mistakes. Recognising these pitfalls helps you make better decisions from the start.
The most common error is installing fixtures without considering sight lines and neighbour impact. A fixture that looks good during the day might create objectionable light trespass at night, shining directly into neighbours’ windows. Always position fixtures with evening sightlines in mind, not just daytime aesthetics. Walk your garden at dusk and imagine how light will behave.
Oversizing fixtures is another frequent mistake. Many people assume that brighter is better, installing 1000+ lumen fixtures where 500 lumens would suffice. This creates harsh glare, wastes energy, and often requires additional shielding to make the space comfortable. Start with moderate output and add fixtures if needed rather than installing oversized units and struggling to manage their glare.
Ignoring colour temperature consistency creates visual discord. Mixing warm white (2700K) and cool white (5000K) fixtures in the same garden feels disjointed and creates uneven glare perception. Choose a single colour temperature and stick with it throughout your installation. If you need flexibility, select fixtures that support dimming and colour adjustment rather than mixing fixed-temperature units.
Neglecting maintenance allows fixtures to degrade over time. A fixture that performed beautifully when new becomes a glare source after a year of weathering and dust accumulation. Plan for seasonal cleaning and occasional lens replacement to maintain performance.
WaterPro’s has helped homeowners correct these mistakes through professional lighting design and installation. Our qualified technicians understand how to assess your garden’s unique conditions and recommend solutions tailored to your property, neighbourhood context, and aesthetic preferences. Whether you’re installing new garden lighting or refining an existing system, proper garden lighting glare prevention transforms your outdoor space into something genuinely enjoyable.
The difference between garden lighting that glares and garden lighting that shines comes down to intentional design and attention to detail. Light positioning, shielding, beam angle selection, and intensity control work together to create outdoor spaces that are safe, beautiful, and comfortable for you and your neighbours. If you’re planning a garden lighting installation or troubleshooting glare in an existing system, consider consulting with professionals who understand how these elements interact. The Illuminating Engineering Society provides technical guidance on outdoor lighting design, and many local councils offer recommendations on responsible outdoor lighting practices. WaterPro’s offers free garden lighting design services to help you plan an installation that works for your property and respects your neighbourhood. Book a consultation with our qualified technicians to discuss your garden’s unique lighting needs and explore solutions that deliver both function and visual comfort.
Frequently Asked Questions
How does light positioning affect glare in garden lighting?
Light positioning is crucial to controlling glare. Fixtures mounted too high or angled directly at eye level create harsh, uncomfortable brightness. Lower mounting heights (typically 0.6 to 1.2 metres) and downward angles reduce direct bulb visibility and light spill. Strategic placement also prevents light from reflecting off surfaces toward neighbours' properties, a key concern for outdoor illumination design.
What beam angle should I choose to prevent light spill?
Outdoor lighting beam angles between 15 and 40 degrees work best for focused, controlled illumination. Narrower angles (15-25 degrees) concentrate light on specific features like accent lighting for plants or pathway lighting. Wider angles (30-40 degrees) provide broader coverage with less intensity per square metre, reducing glare. Choosing the right beam angle prevents light from scattering into unwanted areas and reduces light pollution.
Are glare guards and visors really effective?
Yes. Glare guards and visors block direct bulb visibility, the primary cause of discomfort glare. They work by creating a physical barrier that shields the light source while allowing illumination to reach the ground or target area. Combined with proper fixture shielding and mounting height, visors significantly reduce light trespass and improve safety lighting effectiveness. They're one of the most practical and affordable solutions for existing fixtures.
How does colour temperature affect how bright lighting feels?
Colour temperature, measured in Kelvin, influences perceived brightness and glare intensity. Warm white light (2700K-3000K) feels softer and creates less harsh glare than cool white (5000K+). Warm tones also reduce light pollution and are less disruptive to neighbours. Dimmable fixtures allow you to adjust intensity and warmth throughout the evening, further controlling perceived brightness and creating a more comfortable outdoor environment.
This article was written using GrandRanker