

Table of Contents
- How to Find a Hidden Irrigation Leak
- Common Irrigation System Problems and How to Spot Them
- Step-by-Step Troubleshooting for Leaking Irrigation Systems
- DIY Repairs vs Professional Service: Cost-Benefit Analysis
- Preventative Maintenance to Avoid Future Leaks
- Water Conservation and System Efficiency
- When to Call a Licensed Plumber
- Conclusion
Last Updated: August 27, 2026
How to Find a Hidden Irrigation Leak
A hidden irrigation leak damages underground pipes out of sight. Most homeowners discover leaks only when water bills spike or brown patches appear despite regular watering.
The first sign is usually uneven watering, some areas stay lush while others dry out quickly on the same system. This suggests water is escaping between the controller and sprinkler heads.
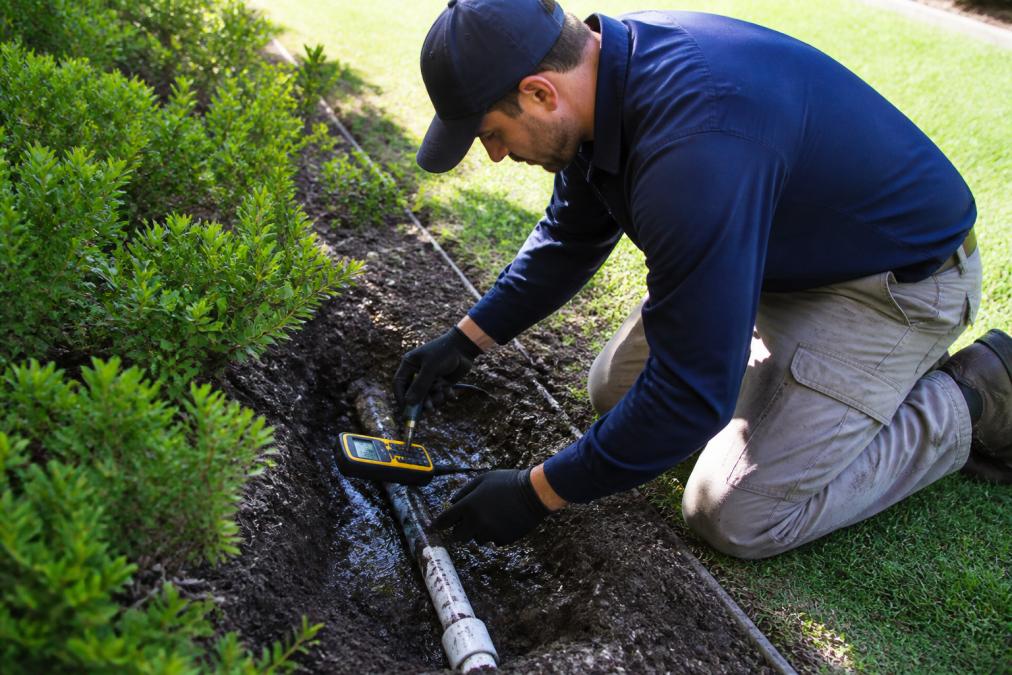
Listen for hissing sounds near irrigation lines during watering cycles. Walk along the pipework and feel the soil; wet patches or unusually soft ground indicate a rupture below the surface. Significant leaks may pool water in low spots or show moss and algae growth in normally dry areas.
Check your water meter before and after running the system for 30 minutes with no sprinklers on. If the meter moves, water is escaping in the pipes. This simple test confirms a leak exists before you start digging.
At WaterPro’s, we use pressure testing and thermal imaging to pinpoint leaks without guesswork. These methods save time and prevent unnecessary excavation.
Common Irrigation System Problems and How to Spot Them
Most irrigation failures fall into three categories: uneven watering, pressure problems, and damaged components.
Uneven watering and dry patches
Uneven watering is the most common complaint. Some sprinkler heads deliver full pressure while others barely trickle, creating obvious patterns of dead grass or shrubs along one zone.
Sediment, debris, or mineral buildup clogs sprinkler nozzles. Calcium deposits accumulate inside heads over time, restricting water flow. Misaligned or sunken sprinkler heads also cause problems, heads settle into soil, changing spray angle or coverage area. Pressure imbalances create dry patches when one zone runs at higher pressure than another.
Water pressure issues
Low or inconsistent pressure indicates a problem upstream. Check whether the issue affects one zone or the entire system. If only one zone has weak pressure, the solenoid valve may be failing or blocked. If all zones are weak, the main valve or primary pipework is likely blocked.
High pressure is less common but equally damaging. Excessive pressure stresses fittings, splits hoses, and blows out seals. Loud banging sounds when the system cycles indicate water hammer, caused by sudden pressure changes.
Broken sprinkler heads and damaged pipework
Broken sprinkler heads are obvious: cracked housings, missing nozzles, or heads that don’t pop up or retract properly. A damaged head wastes water and distributes it unevenly.
Damaged pipework is trickier to spot. Polyethylene pipe cracks slowly as UV exposure and temperature changes make it brittle. Copper fittings corrode from inside, eventually leaking at connections. PVC pipe splits when exposed to freezing or when roots grow through it. You’ll see water seeping from soil or notice soggy ground unrelated to sprinkler head locations.
Step-by-Step Troubleshooting for Leaking Irrigation Systems
Systematic troubleshooting beats random guessing. Work through these steps methodically.
Step 1: Turn off the system and inspect visible components
Switch off your controller and walk the entire system in daylight. Look for obvious damage: cracked pipes, loose hose clamps, split fittings, or disconnected lines.
Check the main valve assembly near your water meter for water dripping from the valve body or pooling around the base. A weeping main valve suggests the seal is failing and typically requires replacement.
Inspect all visible hose connections and clamps. Hand-tighten any loose clamps without over-tightening. If a connection leaks after tightening, the fitting is damaged and needs replacing.
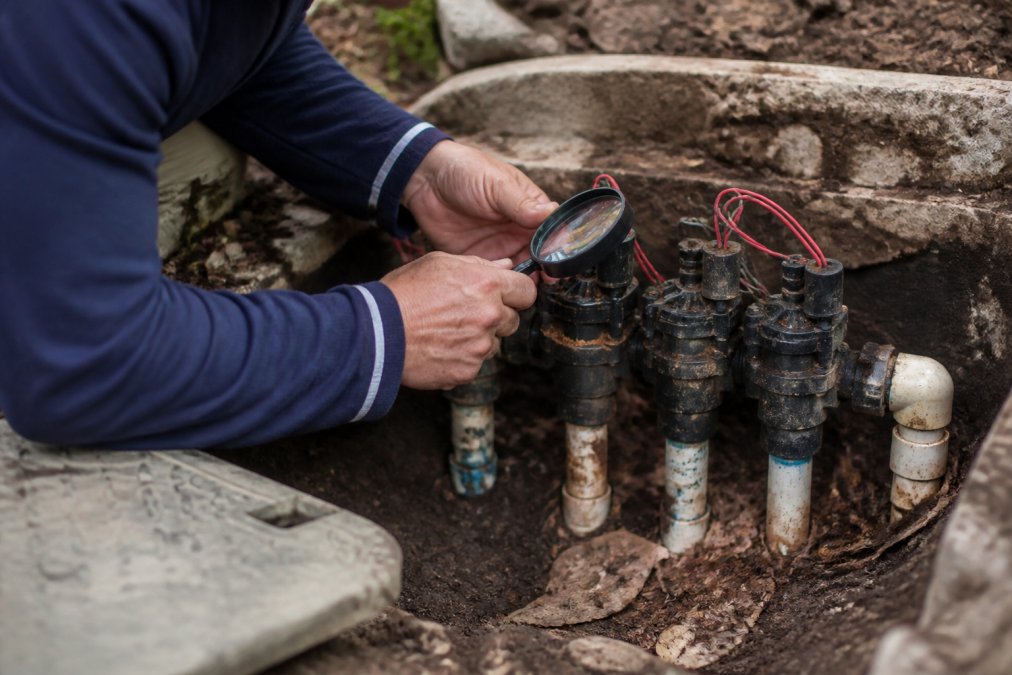
Step 2: Check the irrigation controller and solenoid valves
The irrigation controller is your system’s brain. If malfunctioning, it sends incorrect signals to solenoid valves, causing erratic watering or valves that won’t shut off.
Inspect the controller display for error codes. Most modern controllers show fault indicators when a zone has a problem. Ensure all wiring connections are dry and secure.
Locate the solenoid valve for each zone, usually small cylindrical devices near the main valve. Listen while the system runs. A solenoid that clicks or buzzes but doesn’t open may have a stuck plunger or failed coil. One that doesn’t respond is likely burnt out.
Water dripping from the solenoid valve body indicates internal seal failure. A small drip is often repairable by cleaning. Persistent dripping means the solenoid needs replacement.
Step 3: Examine pipe fittings and connection points
Leaking systems often fail at connection points where pipes join fittings. These joints experience constant pressure cycling, and seals degrade over time.
Turn the system on and watch each visible connection. Water seeping from a joint usually means the fitting is loose or the seal has failed. Try tightening by hand first.
If tightening doesn’t stop the leak, turn off the system and inspect the fitting closely. Corroded fittings are brittle, so work carefully. If damaged or the seal is cracked, it needs replacement.
For underground connections, dig carefully around the suspected area. Wet soil or water pooling near a buried fitting confirms the leak location.
Step 4: Test water pressure across irrigation zones
Pressure testing reveals whether your system is balanced. You’ll need an inexpensive pressure gauge from any hardware store.
Turn off all zones. Connect the gauge to the test port on your main valve or accessible fitting. Record static pressure (system off). Then run each zone individually and record the pressure.
Healthy systems maintain consistent pressure across all zones, typically 2.0 to 3.5 bar (irrigation.org). If one zone reads significantly lower, that zone has a blockage or leak. Pressure above 4.0 bar indicates excessive pressure that will damage fittings and seals. Below 1.5 bar suggests insufficient mains supply or a main valve restricting flow.
DIY Repairs vs Professional Service: Cost-Benefit Analysis
Some irrigation problems are straightforward DIY fixes. Others require specialist equipment and experience.
Simple DIY repairs include tightening loose fittings, replacing a broken sprinkler head, or cleaning sediment from a clogged nozzle. These take 30 minutes to an hour and require only basic tools.
Moderate DIY repairs involve replacing a solenoid valve, swapping damaged hose, or installing a new main valve. These require more skill and the right replacement parts. A mistake can create a bigger leak or damage other components.
Professional repairs are necessary for pressure testing, leak detection in buried pipes, controller programming, and complex valve work. Professionals diagnose actual problems quickly rather than trial-and-error troubleshooting.
WaterPro’s technicians diagnose problems efficiently because they have extensive experience with similar faults. This expertise saves money by avoiding unnecessary part replacements.
Preventative Maintenance to Avoid Future Leaks
Regular maintenance catches problems before they become expensive leaks.
Spring preparation: Inspect all visible components. Check that sprinkler heads move freely and spray patterns are correct. Test the controller and run each zone briefly to confirm water flows with no leaks.
Summer monitoring: Walk the system monthly during the growing season. Look for changes in watering patterns, new dry patches, or wet spots. These are early warning signs.
Autumn shutdown: Before winter, drain all lines to prevent freeze damage. Turn off the controller, close the main valve, and open all drain plugs. In colder regions, this prevents ice formation that splits pipes.
Winter inspection: Use the off-season to inspect pipes for cracks, check fittings for corrosion, and plan upgrades.
Annual professional service: Have a qualified technician service your system annually. They’ll pressure test, clean solenoid valves, inspect connections, and identify components approaching failure. This costs less than emergency repairs.
Preventative maintenance extends system life by 5-10 years and saves thousands in water waste and emergency repairs.
Water Conservation and System Efficiency
A leaking irrigation system wastes water and inflates your bill. Fixing leaks is the fastest way to improve efficiency.
Uneven watering forces longer run times to ensure all areas receive adequate water, wasting water on already-wet zones. Fixing pressure imbalances and replacing faulty heads reduces run time and consumption.
Drip irrigation uses 30-50% less water than spray systems because water is delivered directly to plant roots with minimal evaporation (the EPA). Consider upgrading to drip zones when replacing damaged pipe sections.
Seasonal adjustment of run times prevents overwatering during cooler months. Most systems run the same schedule year-round, but autumn and winter require less frequent watering.
Smart controllers that sense soil moisture or weather conditions reduce water use by 20-30% compared to fixed schedules (peer-reviewed research). These devices pay for themselves through water savings within a few years.
WaterPro’s designs systems with water efficiency in mind, selecting components and layouts that minimise waste while maintaining healthy gardens.
When to Call a Licensed Plumber
Some irrigation problems require a licensed plumber rather than a general handyperson.
Call a plumber if:
- The main water supply valve is leaking or won’t shut off
- Pressure testing shows the problem is in pipes buried under concrete or sealed surfaces
- You suspect a leak in the mains supply line before the irrigation system
- The problem involves backflow prevention devices or cross-connection issues
- Water is pooling near your home’s foundation or under the driveway
Licensed plumbers have tools and qualifications to work with mains supply lines. For irrigation-specific work, a qualified irrigation technician is often more cost-effective.
WaterPro’s works alongside licensed plumbers when jobs require mains work. Our team knows when to call specialists and coordinates work to minimise disruption.
A leaking irrigation system costs money every day it runs unfixed. Water bills climb, your garden suffers, and the problem worsens until addressed. Most leaks are fixable once you identify the source.
Start with the troubleshooting steps above; pressure testing and visual inspection catch the majority of problems. If you need specialist equipment like thermal imaging, WaterPro’s offers diagnostic services. Our qualified technicians diagnose leaking irrigation system issues quickly and recommend cost-effective repairs. Book a service call today and stop wasting water and money.
Frequently Asked Questions
What should I do if my irrigation system is leaking but I can't find where?
Start by turning off the system and looking for visible wet patches, soggy soil, or water pooling in your garden. Check all visible pipe fittings, sprinkler heads, and valve connections. If the leak is underground, look for areas of unusually lush growth or subsidence. Use a moisture meter to pinpoint wet zones. If you still cannot locate it, the leak detection methods in this guide, or a professional with specialised equipment, can find hidden leaks in buried pipework quickly and save you time and water.
How do I repair a leak in my drip irrigation system?
For drip irrigation leaks, first isolate the affected zone and turn off the system. Inspect the drip lines for visible cracks or punctures. Small holes can be sealed with waterproof tape or patched with a drip-line repair coupling. For damaged sections, cut out the compromised section and reconnect with a barbed coupling and hose clamps. Check all emitters and drip fittings for debris or sediment that may cause leaks. If the damage is extensive or affects multiple zones, replacement is more reliable than patching.
How do I know if I need a professional plumber or if it's a DIY fix?
Simple repairs, replacing a broken sprinkler head, tightening a loose fitting, or patching a visible pipe, are manageable DIY tasks. However, if the leak is in underground pipework, involves the main water supply line, requires backflow preventer adjustment, or you've already attempted a repair without success, call a licensed plumber. Professional technicians have leak detection equipment, access to specialised parts, and the expertise to diagnose system-wide issues that DIY inspection may miss.
What's the difference between residential and commercial irrigation repairs?
Residential systems are typically smaller, serve a single property, and use simpler controllers and fewer irrigation zones. Commercial systems handle larger areas, multiple zones, and higher water pressure requirements. They often include more complex valve arrangements, backflow preventers, and integrated controllers. Repairs to commercial systems require knowledge of larger-scale pipework, compliance with water authority regulations, and ability to diagnose issues across multiple zones without disrupting operations. A technician experienced in both types can assess your property and recommend the right approach.
This article was written using GrandRanker