
Table of Contents
- Signs of Water Pump Failure
- Common Water Pump Problems and Troubleshooting
- Water Pump Troubleshooting Guide
- DIY vs. Professional Repair Thresholds
- Cost of Water Pump Repair
- Preventative Maintenance and System Diagnostics
- Pump Installation, Replacement, and Emergency Services
- Conclusion
Last Updated: August 17, 2026
Signs of Water Pump Failure
Your water pump is one of those systems you don’t think about until it stops working. When it fails, the consequences ripple through your entire property: no pressure for showers, irrigation systems that won’t run, and potentially serious damage to your home’s plumbing infrastructure.
Early warning signs include low water pressure that develops gradually, strange noises like grinding or squealing that signal impeller damage, and pump cycling issues where the system turns on and off more frequently than normal. If your pressure tank doesn’t maintain its charge or pressure drops quickly after the pump stops, your pump or its associated components are failing. Visible leaks around pump seals or connections are an obvious red flag.
At WaterPro’s, we’ve found that homeowners often wait too long to address these early warning signs. What starts as a minor issue becomes expensive when seal failure leads to motor burnout or when a failing check valve allows water to drain back into the tank overnight. The best approach is to act as soon as you notice something off with your residential water pump repair needs.
If your pressure drops suddenly rather than gradually, check your pressure switch first, it’s often the culprit and is one of the cheapest components to replace. A pressure switch adjustment sometimes solves the problem entirely.
Common Water Pump Problems and Troubleshooting
Water pump failures typically fall into a few predictable categories. Understanding which problem you’re facing helps determine whether you can handle a quick fix or need professional help.
Low Water Pressure
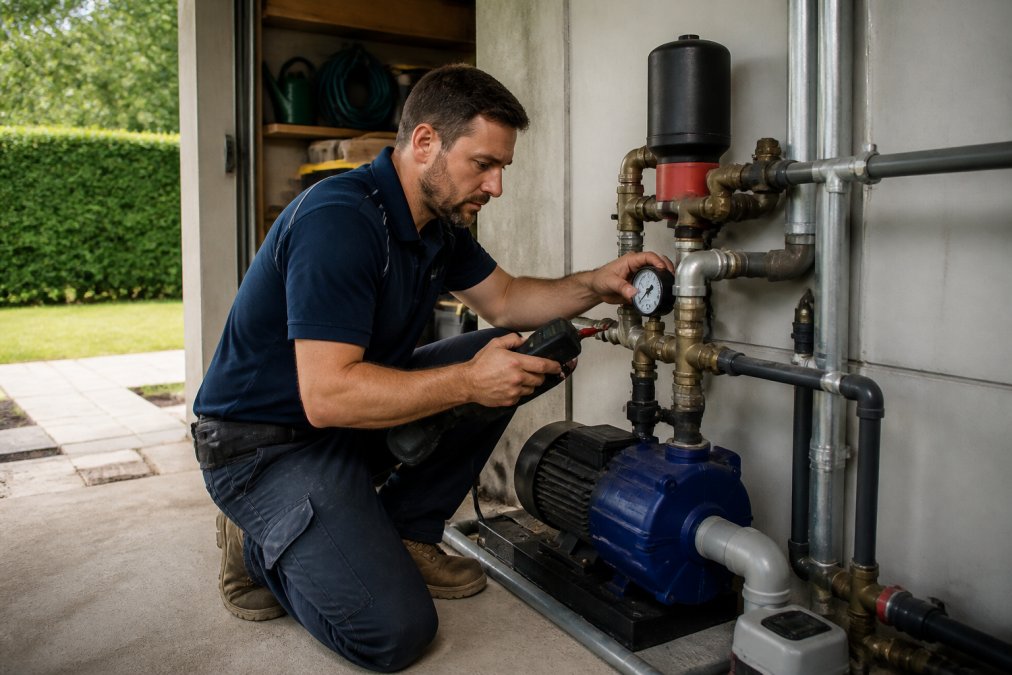
Low water pressure is the most common complaint. A failing pressure switch often causes this, this component tells your pump when to turn on and off based on tank pressure. If it’s stuck or miscalibrated, the pump won’t maintain adequate pressure. You can test this yourself by checking the gauge on your pressure tank, which should read between 40 and 60 pounds per square inch (psi) when the pump is off.
Non-return valve failure is another common cause. This one-way valve prevents water from flowing backward into the pump when the system is at rest. When it fails, pressure bleeds away overnight or between pump cycles. If your pressure drops quickly after the pump stops, suspect the non-return valve.
Leaks in the system, visible or hidden, will steadily reduce pressure. Check all visible connections, seals, and pipe joints. A partially blocked inlet filter or clogged suction line reduces the volume of water the pump can draw, leading to lower discharge pressure.
Unusual Noises and Cavitation
Grinding, squealing, or rattling sounds from your pump indicate mechanical problems that need attention. These noises often signal cavitation, a condition where air bubbles form inside the pump, collapse violently, and damage the impeller.
Cavitation typically happens when the pump struggles to draw water due to a partially blocked inlet, low water level in your tank, or air leaks in the suction line. A squealing sound usually means the pump bearings are wearing out or the motor is under strain. Grinding noises suggest impeller damage, the rotating component inside the pump is hitting the housing or breaking apart.
These noises are your pump’s distress signal. Ignoring them typically leads to seal failure and motor burnout, which makes a simple repair into an expensive replacement.
Never ignore unusual pump noises. Continuing to run a pump that’s cavitating or grinding accelerates damage exponentially. Turn it off and diagnose the problem immediately, waiting even a few days can turn a repairable issue into a motor replacement.
Pump Cycling Issues
A pump that cycles on and off more frequently than usual is working harder than it should. Rapid cycling, where the pump turns on every few minutes, suggests the pressure switch isn’t functioning correctly or the check valve is leaking. When the check valve fails, water drains from the pressure tank back into the well or bore, so the pump must restart constantly to maintain pressure.
Another cause is a waterlogged pressure tank. If the air bladder ruptures or the air charge is lost, the tank fills completely with water and can’t store pressure. The pump then cycles constantly because the system has nowhere to store the pressurized water temporarily.
Cycling issues are inefficient and waste energy while accelerating wear on pump components.
Water Pump Troubleshooting Guide
Before calling a technician, you can perform a few diagnostic checks yourself. This step-by-step approach helps identify whether you’re facing a simple fix or a problem requiring professional repair.
Step 1: Check the Pressure Switch
The pressure switch is your starting point because it’s affordable to replace and often the source of problems.
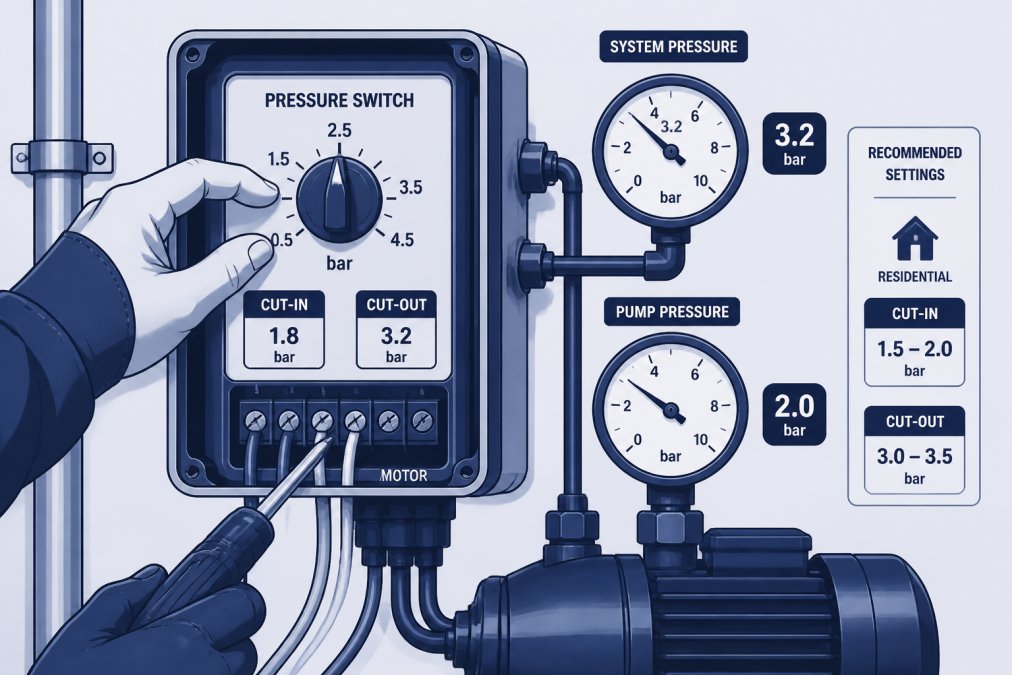
Locate your pressure tank and find the pressure gauge mounted on it. A healthy system typically shows 40-60 psi at rest and 60-80 psi when the pump is running. If the readings are significantly different or the gauge doesn’t move, the switch may be stuck.
Look for the pressure switch itself, a small component with electrical connections usually mounted on the side of the tank. Gently tap it with a screwdriver handle, sometimes a stuck switch will free up with a light tap. If the pump suddenly starts or stops, the switch was stuck.
Check the adjustment screw on the pressure switch if tapping doesn’t help. Most switches have a nut you can turn to adjust when the pump engages. Turn it slightly counterclockwise to lower the engagement pressure or clockwise to raise it. Make small adjustments, a quarter turn at a time, and test the system. If adjusting the switch doesn’t solve the problem, the internal mechanism is likely worn and the switch needs replacement.
Step 2: Inspect for Visible Leaks
Walk around your entire pump system and look for water escaping anywhere it shouldn’t be. Pay special attention to connection points, seal areas, and the pump housing itself.
Check where pipes connect to the pump. Leaks at these joints often respond to tightening the connection nut. Use two wrenches, one to hold the fitting steady and one to turn the nut. Tighten gradually and test for leaks.
Inspect the pump shaft seal, the area where the motor shaft enters the pump body. A small weep hole below this seal allows a tiny amount of water to escape during normal operation. If water streams from this area or pools beneath the pump, the seal is failing and the pump needs professional attention.
If you can’t find visible leaks but suspect one exists, check your water meter. Turn off all water use in your home and garden, then check the meter again after an hour. If it’s advanced, you have a hidden leak somewhere in your system.
Step 3: Test the Non-Return Valve
The non-return valve (also called a check valve) is critical for maintaining system pressure. A failed valve causes pressure to drop overnight or between pump cycles.
Turn off your pump and note the pressure reading on your gauge. Wait 30 minutes without using any water. Check the pressure again. A healthy system should lose minimal pressure, perhaps 5-10 psi. If pressure drops significantly or to zero, your non-return valve is leaking.
The non-return valve is typically located on the discharge line leaving the pump. If it’s external and accessible, you can try cleaning it. Turn off the pump, isolate the valve by closing any isolation taps nearby, and carefully unscrew it. Gently clean any sediment or debris that might prevent it from sealing properly, rinse thoroughly, and reinstall.
If cleaning doesn’t restore pressure, the valve’s internal sealing surfaces are likely damaged and it needs replacement.
The three most common fixes, adjusting the pressure switch, tightening leaking connections, and cleaning or replacing the non-return valve, solve roughly 70% of residential water pump problems without requiring motor replacement or major repair work.
DIY vs. Professional Repair Thresholds
Knowing when to handle a repair yourself and when to call a professional saves money and prevents damage.
Handle these yourself:
Pressure switch adjustment is safe and inexpensive. Tightening leaking connection nuts is straightforward with two wrenches and careful technique. Cleaning a non-return valve is manageable if you’re comfortable turning off the pump, isolating the system, and unscrewing a fitting. Checking your pressure tank gauge and testing pressure readings is purely diagnostic and can’t damage anything.
Call a professional for these:
If your pressure switch adjustment doesn’t hold or the switch needs replacement, a technician can install the correct part and verify it’s calibrated properly. Seal failure or visible leaks from the pump housing itself indicate internal damage. Motor burnout requires professional assessment, if your pump won’t start or runs but produces no pressure, the motor may have failed electrically. Cavitation or grinding noises suggest impeller damage or bearing failure requiring specialist work. Hidden leaks require professional leak detection equipment.
The general rule: if the problem involves internal pump components, electrical systems, or you’re uncertain about the diagnosis, call a professional.
Cost of Water Pump Repair
Repair costs vary considerably depending on what’s wrong and whether replacement is necessary.
Simple adjustments and tightening typically cost nothing if you do them yourself or a modest service call fee if you hire a technician. Pressure switch replacement usually costs less than a service call, as the component itself is inexpensive and installation takes 15 minutes. Non-return valve replacement is similarly affordable.
Seal replacement or pump rebuilding varies depending on the pump type and damage extent. For older pumps, replacement often makes more financial sense than extensive repairs. Complete pump replacement involves the cost of the new pump, installation labour, and any necessary adjustments to your system.
For specific pricing on your situation, contact WaterPro’s for a quote. They can diagnose your problem and provide transparent cost estimates before any work begins.
When comparing repair quotes, ask specifically what’s included in the price. Some quotes include pressure testing and system verification after repair; others don’t. A slightly higher quote that includes comprehensive testing often provides better value than a lower quote that doesn’t verify the repair worked.
Preventative Maintenance and System Diagnostics
The best approach to water pump problems is preventing them before they occur. Annual pressure system inspection is essential, have a technician check your pressure tank condition, test the pressure switch calibration, verify the non-return valve is functioning, and inspect all visible connections for leaks.
Monitor your water pressure regularly and keep a note of normal readings so you’ll notice when something changes. Flush your system periodically if you have a bore or tank water supply to remove sediment accumulation. Check your pressure tank air charge annually, as the air bladder loses pressure over time.
System diagnostics go beyond simple observation. WaterPro’s uses specialized equipment to measure flow rate, test head pressure, assess pump efficiency, and identify problems that aren’t obvious during casual inspection. Energy efficiency audits examine your entire system to identify where energy is being wasted and reveal whether your pump is operating at optimal efficiency.
Pump Installation, Replacement, and Emergency Services
When repair isn’t practical, pump replacement becomes necessary. Installation quality matters enormously, a poorly installed pump will cause problems from day one.
Pump installation requires selecting the right pump for your water requirements, proper sizing of pipes and connections, correct pressure switch calibration, and thorough testing before the system goes into full operation. WaterPro’s handles pump installation with attention to these details, assessing your water needs, recommending appropriate pump models, installing the system correctly, and verifying it performs as expected.
If your pump is over 10-15 years old and experiencing problems, replacement often makes more sense than repeated repairs. Older pumps become less efficient, parts become harder to find, and repair costs accumulate. A new pump with modern efficiency standards reduces your long-term energy costs.
Emergency repair services are essential when your pump fails unexpectedly. WaterPro’s offers rapid response times for emergency calls and maintains stock of common replacement parts so repairs can often be completed the same day.
Conclusion
Water pump problems progress from minor inconveniences to serious emergencies if left unaddressed. Early diagnosis, recognising pressure drops, unusual noises, and cycling issues, prevents costly failures. The troubleshooting steps outlined here address the most common issues: pressure switch adjustment, leak detection, and non-return valve testing.
For problems beyond these basics, professional assessment saves time and prevents guesswork. WaterPro’s provides comprehensive water pump repair services, from initial diagnostics through complete system replacement. With over three decades of experience serving the Melbourne community, their qualified technicians deliver reliable repairs backed by expert knowledge. Contact WaterPro’s to book a service call and get your water system back to full performance.
Frequently Asked Questions
What are the most common signs of a failing water pump?
Common warning signs include reduced water pressure throughout your home, unusual grinding or squealing noises from the pump, the pump cycling on and off more frequently than normal, visible leaks around the pump housing, and water that appears discoloured or contains debris. If you notice any of these signs, professional diagnosis is recommended to prevent complete system failure.
How much does water pump repair typically cost?
Water pump repair costs vary significantly depending on the type of pump, the nature of the problem, and required parts. Minor repairs like pressure switch adjustment or seal replacement may cost less than major issues such as impeller damage or motor burnout. For an accurate quote tailored to your specific situation, contact a qualified technician who can diagnose the fault and provide transparent pricing before beginning work.
Can I repair a residential water pump myself?
Simple troubleshooting steps like checking pressure switches or inspecting for visible leaks can be done by homeowners. However, most water pump repairs require professional expertise, specialised tools, and knowledge of electrical and hydraulic systems. Attempting complex repairs without proper training risks causing further damage, voiding warranties, and creating safety hazards. Professional repair is recommended for electrical faults, impeller replacement, and seal failure.
How often should my residential water pump be serviced?
Regular preventative maintenance helps extend pump life and prevent unexpected breakdowns. Most residential systems benefit from annual inspection and servicing, though frequency may increase if your pump operates under heavy demand or in areas with poor water quality. Professional technicians can assess your system's condition and recommend a maintenance schedule suited to your specific needs and usage patterns.
This article was written using GrandRanker